When projects stay on paper—or inside PDFs and VR goggles—teams debate hypotheticals. The BluView Experience replaces guesswork with a shared, full-scale reality you can walk, measure, and change together. In one focused session, owners, architects, and builders align on what the space should be and how it should work—so you leave with decisions, not more meetings.
The problem with 2D/VR-only reviews
2D drawings are fantastic for documentation, but they ask people to translate symbols into lived experience. That’s where mistakes creep in. Hallways that “meet code” feel cramped. A door swing that clears on plan clashes with casework in practice. VR helps with immersion, but it’s still a headset experience—one person at a time—without the choreography of multiple people moving through space together. The result? Slow approvals, late-stage changes, and change orders that bite into budget and schedule.
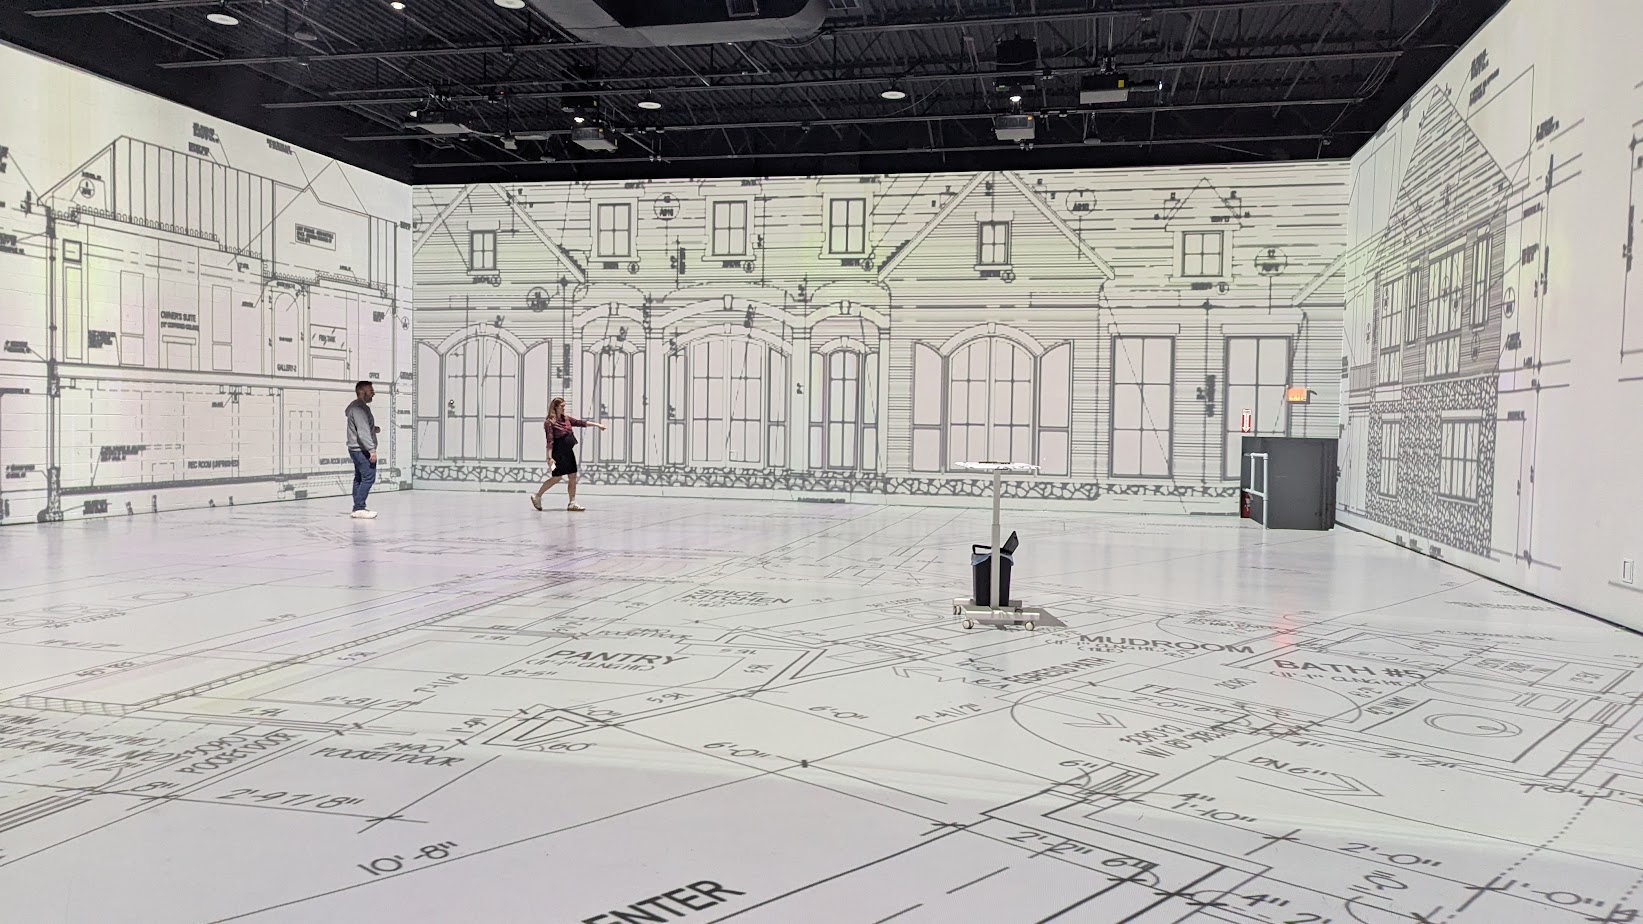
With BluView’s full-scale environment, everyone sees and feels the same thing at the same time. You’ll discover right away if a corridor pinches during shift change, if a conference room truly seats twelve with comfortable egress, or if the kitchen’s work triangle actually works.
Why 1:1 scale changes behavior (human-factors, circulation, sightlines)
At true 1:1 scale, human factors become obvious—and actionable:
- Circulation & flow: Walk the routes people will take. Do paths conflict? Are turning radii adequate for carts, strollers, or wheelchairs?
- Proximity & adjacencies: Stand in rooms to judge acoustic separation, privacy, and handoff distances.
- Sightlines & supervision: Check visibility to entrances, waiting areas, or nurse stations.
- Reach & clearance: Confirm comfort for door swings, storage access, and equipment footprints.
- Scale & proportion: Experience ceiling heights, window placement, and furniture spacing as they’ll feel in real life.
This isn’t theoretical design. It’s embodied decision-making—where friction points surface before they become field fixes.
The Co-Design Session: Who’s in the room, what to bring, how it flows
Who should attend: Owner/rep, architect/designer, GC/PM, key subs or vendors as needed (MEP, casework, equipment), and end-user stakeholders (nurses, teachers, managers, tenant reps).
What to bring: Latest plan set (PDF or standard CAD/BIM exports), program requirements, finish intent (if available), equipment lists, and a short list of “must-decide” questions.
How it flows: We project your plan at full scale. The group walks, discusses, and flags issues. A facilitator captures decisions while a live designer makes adjustments you can immediately test. That iterative loop—walk → decide → adjust → walk again—compresses weeks of back-and-forth into one working session.
Live edits that stick: walls, door swings, furniture test-fits
Small moves can have big impacts. In-session, you can:
- Nudge walls to clean up dimensions or improve adjacencies
- Flip or resize door swings to improve egress and accessibility
- Test furniture layouts at scale—desks, tables, seating, storage—using full-size templates
- Adjust casework for reach heights, clearances, and workflow
- Validate power/data locations against real use patterns
Because everyone watches changes play out at human scale, decisions have immediate buy-in—and stick.
Compliance you can feel: ADA clearances, egress, equipment footprints
Compliance is easier to negotiate when it’s visible and walkable:
- ADA: Verify turning circles, approach clearances, reach ranges, and accessible routes with your team physically moving through the plan.
- Life safety: Walk egress paths, check door-to-stair relationships, and confirm landing widths and travel distances.
- Equipment & specialty zones: Place full-scale equipment outlines (e.g., refrigeration, imaging, kitchen lines) to validate working clearances and service access.
These “feel checks” transform code conversations from abstract to obvious, reducing RFIs and late-stage redesigns.
What to measure: fewer RFIs, change-order reduction, approval time
A BluView session is not just a better meeting—it’s measurable progress. Track:
- Decision velocity: How many open issues were closed in-session?
- RFI avoidance: Which potential RFIs were prevented by catching conflicts early?
- Change-order reduction: Which scope tweaks eliminated later rework or custom fixes?
- Layout confidence: Post-session satisfaction scores from stakeholders and end users.
- Schedule impact: Days or meetings eliminated from the approval cycle.
Tie these to tangible outcomes—fewer back charges, clearer bids, and a calmer construction phase.
Playbook: A 90-minute agenda you can reuse
00:00–00:10 – Kickoff & goals
Confirm objectives, roles, and the “must-decide” list. Assign a facilitator and a scribe.
00:10–00:30 – Primary circulation walk
Walk main paths of travel at full scale. Flag pinch points, crossings, and sightlines.
00:30–00:55 – Program zones & adjacencies
Room-by-room checks for size, proximity, and access. Validate door swings and furniture test-fits.
00:55–01:15 – Compliance & services
Run ADA turning circles, check egress routes, and lay out key equipment footprints. Align on service and maintenance access.
01:15–01:25 – Live edits & rapid retest
Implement the priority changes. Walk the updated plan to confirm improvements.
01:25–01:30 – Decisions & next steps
Document finalized choices, assign action items for drawings/specs, and set the date for a short validation check (if needed).
Case-style scenario (fictionalized): from five meetings to one
A developer planning a 12,500 SF office fit-out had been stuck in looped reviews: the architect recommended one conference layout; the tenant rep wanted more huddle rooms; the GC was worried about egress. Over a month, four meetings generated three different furniture plans and zero decisions.
In a single BluView session, the team walked at full scale, immediately noticing a corridor pinch near the pantry during peak flow. They slid a wall 8 inches, flipped a door, and swapped two huddle rooms for one larger collaborative space with better sightlines to the reception area. They plotted power/data drops in real time, confirmed ADA turning circles, and settled on a standard workstation footprint. By the 90-minute mark, all previously debated questions were decided—and the architect left with a clean markup set for the next-day revision. The GC pulled two weeks out of the schedule, and the tenant got the layout they could feel good about—because they physically felt it.
Checklist: Is your project ready for a full-scale session?
- You have a plan set at DD or later (or a well-defined SD ready for stakeholder review)
- There are 5–15 open layout decisions blocking progress
- Multiple stakeholders need to experience the design together—at the same time
- You anticipate complex circulation, equipment, or accessibility requirements
- You want to reduce RFIs, align early on furniture/equipment, and accelerate approvals
- You’re ready to leave the room with real decisions, not more “homework”
If you checked three or more boxes, you’re ready.